


Hard surface model
- Manan Sarkhedi
- Jan 17, 2023
- 3 min read

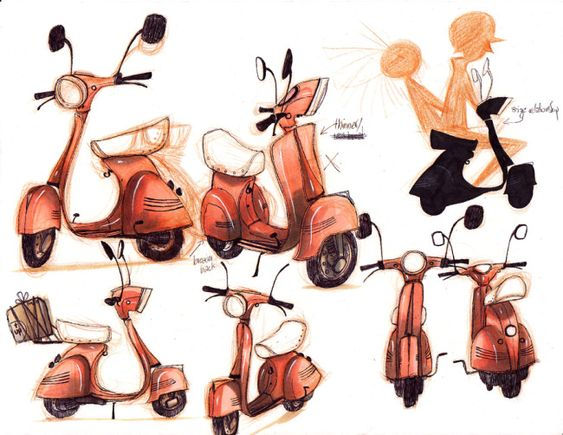
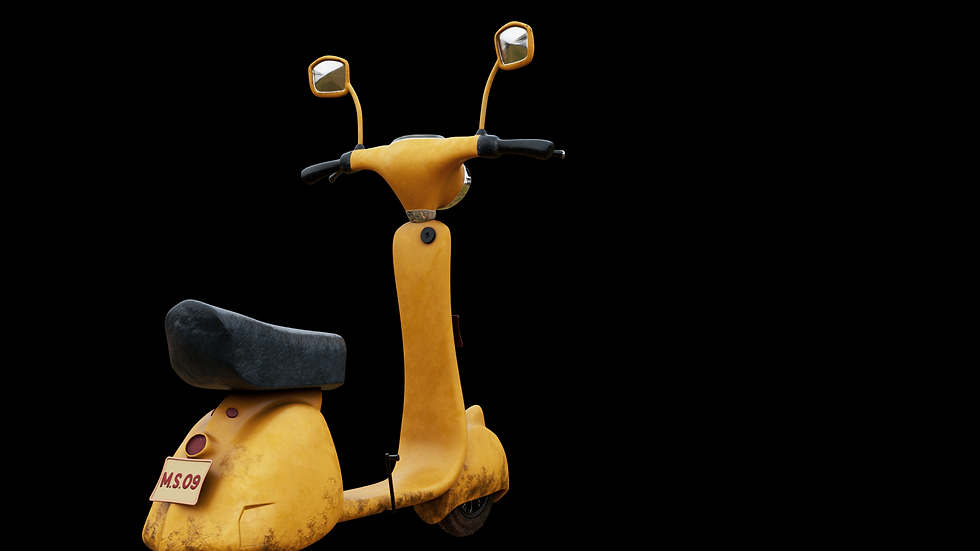
I started researching the hard surface model I wanted to make in week 7 and decided to make a scooter. I took a simple reference by RaquelJosé ART and references and then added details to the model by myself from other real world references.
Modelling in Zbrush
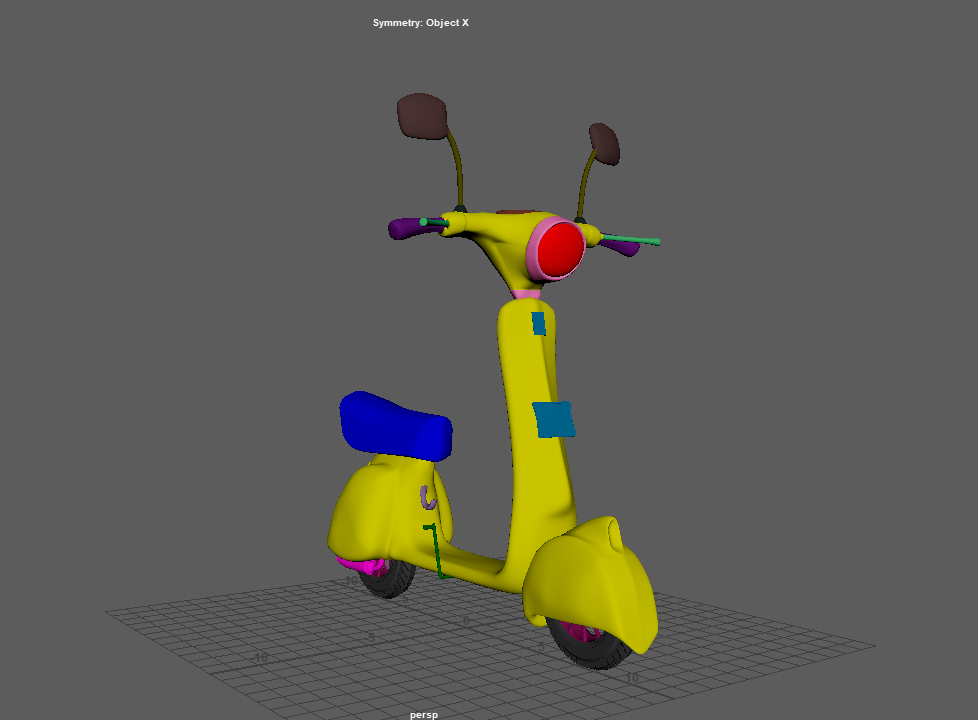
I started in modelling in Zbrush because even for things like the basic block-out, I feel more comfortable with Zbrush than Maya and I have to do the retopology later anyway. I used the standard brushes like the move, damstandard and clay build-up for blocking out the model.


But making a smooth hard surface model is a really time consuming process, because a lot of surfaces need to be smoothened out manually.
I also learnt more about hard surface modelling in Zbrush and tools used to do that like the zmodeler and polish brushes to make the surface smoother. I tried the brushes from the lightbox that I completely forgot existed. I tried the crease brush to carve out some of the details. I also ended up creating a few small things directly in Maya like the wheels, exhaust, seat and a few others.

Retopology
Retopology for the scooter was fairly simple, except the head where I had to really figure out how to connect the mirrors, brakes and handles without creating a ton of extra topology. But the rest was done quite quickly.
UV mapping this model was quite a task and I ended up doing the mapping for the body twice because I just didn't like the first draft and felt like there would be a lot of weird seams in the texturing.

Texturing
After UV mapping I tried a technique called ID mapping which is basically giving colour IDs to parts which makes it easier to texture.
Then I brought the model into substance painter and baked the maps. This is the first time I was baking a model made my me. And it turned out pretty good. There were a couple of issues with my backside number plate so I just ended to duplicating my front plate to the back side.


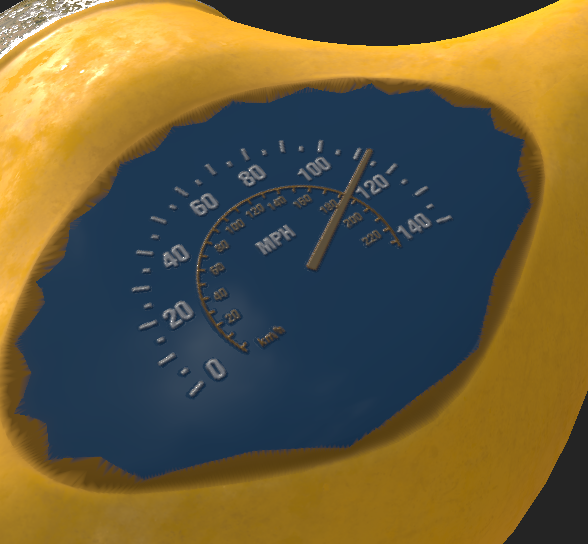
I learnt a lot of new things texturing this model and one of favorite thing was UV projection which let me make my own number plate, logo and helped me give an odometer. I just had to create it in photoshop and bring the .psd in substance, project it and give it a bit of height.

I also found a video which used a height map on which they put a brick generator and scaled it up to get the effect of depth which I used in my headlight.

For the rest I just used paint brush and generators to create a rougher effect and added a but of dirt and rust at some places.

I exported the texture maps at a 2k resolution and imported them to Maya. I used the substance plugin and to map out the textures and displacement scaler to avoid inflation in places especially the headlight which really needed it.
Lighting
Initially to light up the scene I used a bunch of area lights because the lighting just didn't feel enough, which is when I realised HDRIs would do a much better job, so I ended up using them and just put a couple of area lights to give highlights and it made a big difference.

Before starting the final render sequence, I tried to make sure to have as little noise as possible, I checked AOVs and after getting a decent result, I started the final render.
Final thoughts and Self critique:
Finishing this model was taught me a lot and helped me solidify some of the fundamentals. After texturing this, I also felt really comfortable with substance painter and learnt a lot about lighting and rendering.
However, I do feel I could improve a few things. Topology at the mirror surface could have really been much better. I made too many texture sets and IDs which made it so much more time consuming to map them. Could have painted the normal brush details. I should have made a more smoother Zbrush sculpt so that I could have added in details and baked high quality normal maps.

Comments