


Organic model
- Manan Sarkhedi
- Jan 15, 2023
- 4 min read

This organic model was supposed to be the culmination of everything I have learnt; from learning how to open Maya in September to making a production ready asset. I started researching the character I wanted to make in about the seventh week of our module. I used artstation and Pinterest to browse and select the character and found this illustration of a Mushroom King by Andrew Bosley.

After selecting the character I sketched a character sheet in photoshop to use as a reference while modelling and it really helped in maintaining proportions.

I took a few more references to help me with the anatomy of the character and made a Pureref file. I added more references as I progressed.

Modelling in Zbrush
After adding the sphere, the first thing I did was to add the sheet in Zbrush before blocking it out.

I mostly used move brush, clay buildup and dam standard to block the character. I wanted to get the proportions right before moving forward. I also learnt about polishing brushes like trim dynamic, trim adaptive, flatten and Hpolish which helped me polish the mushroom trunk.
This was also the first time time I used polygroups in my workflow. I made two models for practice during the module but never quite understood the point of polygroups, but working with a much more complex model gave me an idea and really helped my workflow.

For the big mushroom's bottom part I used clay buildup with dam standard.

Using alphas really helped for skin pores, skin deformation on fingers and adding texture on the mushroom and wood.

After making the model and making sure everything looked decent, I decimated the model to decrease the poly count before importing it to Maya.
Retopology
After importing it to Maya, I did the retopology using quad-draw tool. and maintaining edge flow at the joints. While doing this I got some feedback from Richard for my model.


Incorporating changes given by Richard
Changes in the wrist to hand transition, clothes, changing the proportions of the hand, butt separation, torso looking too boxy and combining certain meshes to make them animation ready.
So I imported another mesh into Maya with these changes and did the retopology accordingly.
UV mapping
I had already done UV mapping a few times by now and my retopology really made it easy to map it so UV mapping was done really fast and layouting it was also really done quickly.

Before taking it to substance painter I just did a quick and small subdivide at 1 level to make it a bit smoother. I deleted the history, froze transformations and organized the file a bit.
Texturing
After importing the low poly model to substance, it was time to bake.

Baking Mesh maps is something that seems simple but takes some trial and error to get it just right, and the thing I was worried about the most was the Normal map. Putting the details on low poly asset is not something I had tried before and I was quite happy with the way it turned out.

After that I just started texturing everything. I added a basic fill color to everything and built up from there.
Painting skin was quite a task for me, to get the texture and color of the skin just right. I added multiple levels of fill layers with different colors and added grunges to make the character look old. I also built up dirt and other grunges through generators and paint brushes over the model.
(add img)
I also learnt about adding creases to pants through a texture which gave the depth to the pants that it needed.


After being satisfied with the texturing part it was time to export the textures.
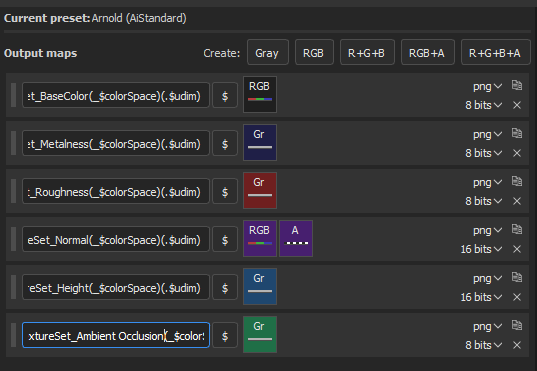
While exporting textures, I used the Ai standard surface template and added the Ambient occlusion map to it and exported it at 2048 with 16 bits.
After importing it to maya I used the substance plugin to add the textures and map them consistently.

I also added eyes to the character in Maya just by using spheres as I thought it would be faster and easier, although I should have imported to substance and given them smaller details. Also seeing the object in renderview a lot of parts with displacement get inflated and solving it is done by adding the Catclark type and increasing the iterations and changing the displacement scale.

Lighting is another aspect that really enhances the look of the model. I used normal arnold area lights and HDRIs to light the model. I experimented with the HDRIs to get the look I wanted. For render settings I applied AOVs to see where the noise was and just tried different settings for a bit to get less noise. I didn't use the denoiser to get more efficient render times.
After that I just created a turntable and rendered it out.
Final thoughts and self critique: This took a lot of effort from me as well as a lot of help from my friends and my professor. But after all the struggles and crashes making this asset, seeing it for the first time in render view was one of the most satisfying experiences for me.
There are quite a few things I could have worked upon a bit more. I could have worked on the retopology of the tree and the hair a bit more so that the normal maps would have baked even better. I wanted to work with xgen for all the hair. I wished I would have made the eyes before exporting the mesh to substance so that I could have painted the red and the veins in the eyes. Also I could have used the naming conventions a bit better, because substance did not pick up my named meshes when I tried with the by mesh names.
Overall, this module involved a lot of learning by myself as well as discussing with others to solve a problem. It taught me everything from learning how to make a cube to making an pretty good, almost production ready asset.


Comments